How to Configure Proxy on Android


Methods of Setting Proxies on Android
When setting proxies on Android, you have multiple choices depending on your unique requirements. There are 4 methods of configuration proxies on Android. This includes setting the default proxy under the access point, assigning a proxy to a specific WI-FI connection, using a proxy client to force all web traffic via your proxy, or setting a proxy on the specific app that requires proxies. I will show you how to complete each and let you know the best use cases for each.
Default Proxy Setup Method — Access Point Name
The first proxy setup method on Android is by configuring the proxy in the access point name settings. This is the default setting and proxies configured here will work provided you access the Internet using your SIM card. While this is a straightforward approach, it does have it drawbacks.
The number one drawback you’ll have to deal with when using this approach is that some of the applications on your phone can bypass it. When this happens, the only option you have is to use a proxy client which I will also show you how to use. Below is how to configure proxies under the Access Point Name.
Step 1: Get your proxy credentials ready — this includes the proxy address, port, username, and password.
Step 2: Go to settings on your Android device and select “SIM card and mobile network” — this might have a different name on your device.
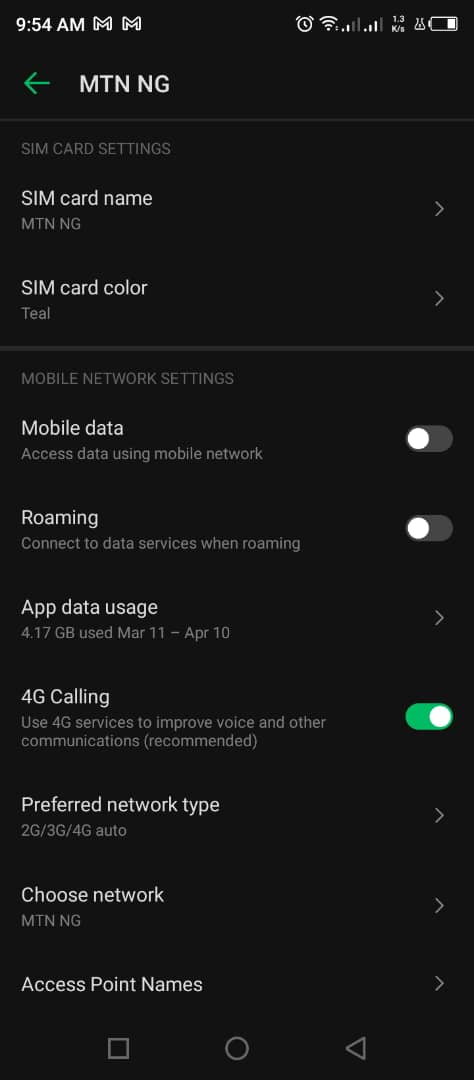
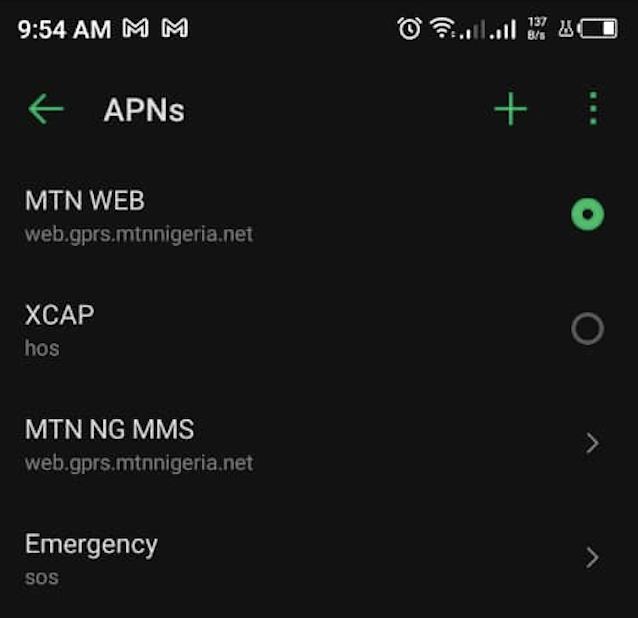
Step 3: Go to “Access Point Names” and click on your current APN. This will take you to the settings interface.
Step 4: Scroll down to “Proxy” and enter the proxy address. Below it is the “Port”. Enter the port too.
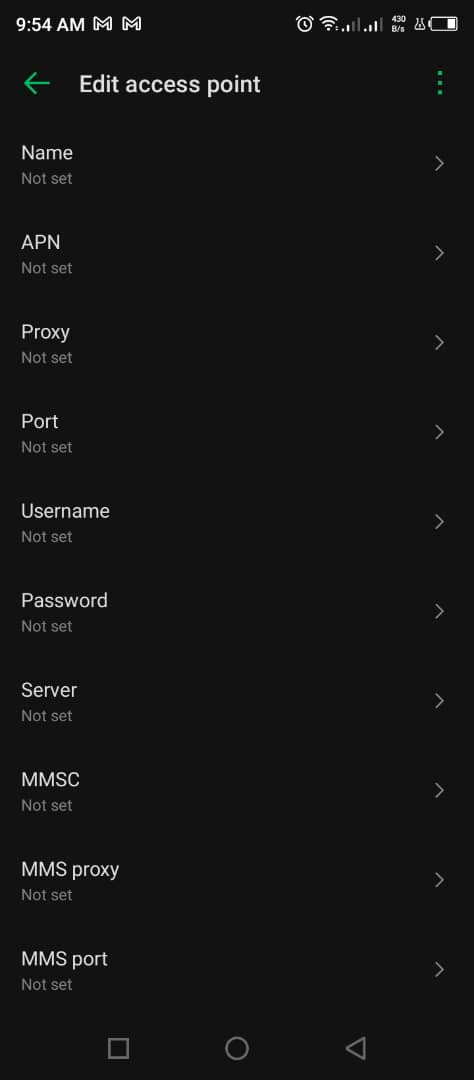
Step 5: Save the changes you made and exit the settings area.
Step 6: Go to your browser and try accessing any site; you’ll notice a pop-up, asking you for the username and password for authentication. Provide it and you submit it.
Step 7: If no error occurs, visit www.ipinfo.io and view your IP address details there, you’ll notice the IP there is not your real IP but that of the proxy. You have successfully set up a proxy and connections in your browser via your SIM card will go through the proxy you configured.
Proxy Setting for WI-FI Networks
When you access the Internet via a Wi-Fi network, the IP address since by your target websites is that of the Wi-Fi and the Wi-Fi also has some censoring power over your Internet access. If you want to change all of these and take back control, allow you also to unblock websites. However, when it comes to setting for Wi-Fi networks, the settings are specific to the network to set it for only. Below is how to get that done.
Step 1: Again, you need the proxy address, port, username, and password.
Step 2: Go to settings and enter the Wi-Fi settings area. Choose the specific Wi-Fi you’re connected to.
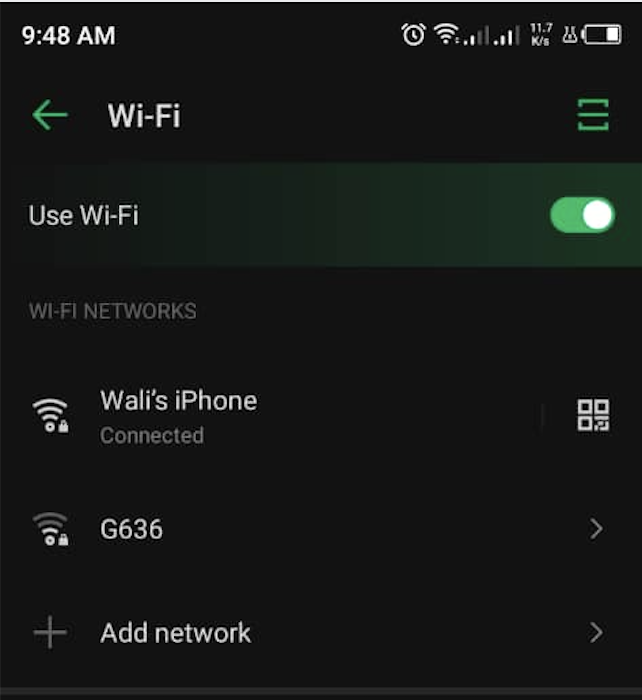
Step 3: Depending on your specific Android version and device, go to the advanced settings for the network.
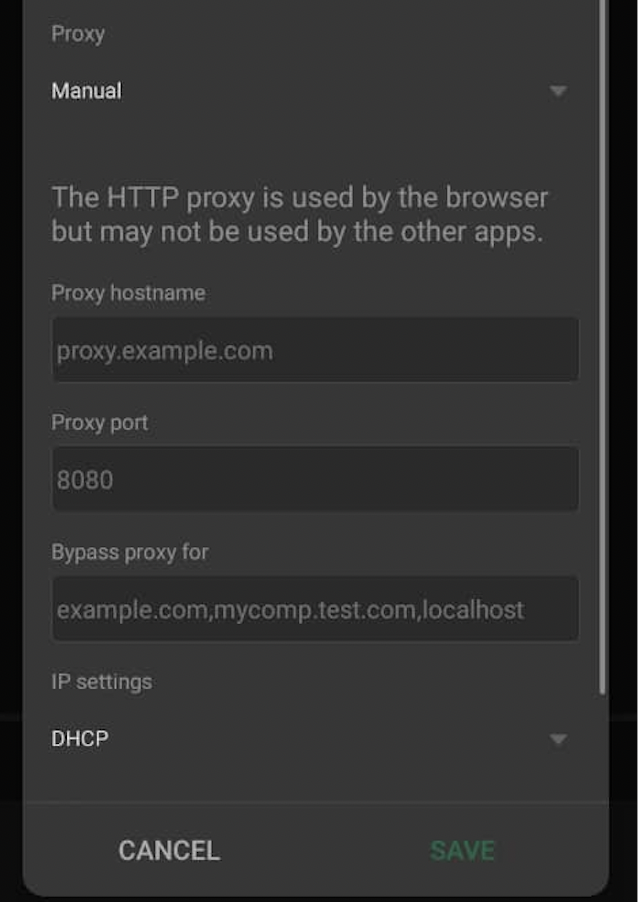
Step 4: Click on “Proxy” and choose “Manual”.
Step 5: Provide the proxy address and port.
Step 6: Save it and head over to your browser.
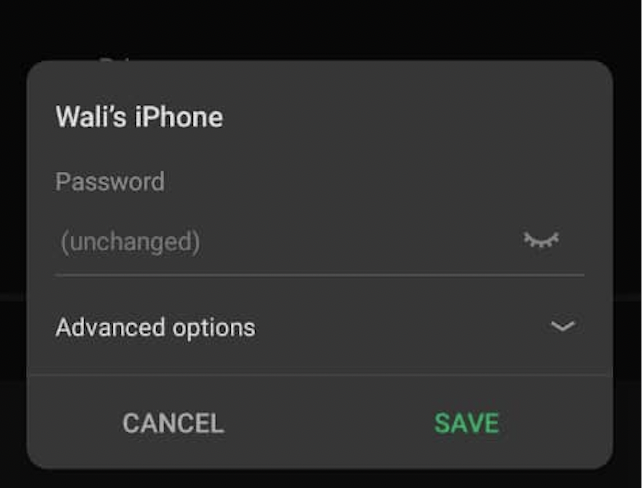
Step 7: When you try accessing any site, you’ll be prompted first to provide a username and password for authentication.
Step 8: Provide the correct username and password.
Step 9: To check whether the configuration went through, visit www.ipinfo.io and look up the IP address and location of your IP address.
Using ProxyDroid — A Proxy Client
There’s nothing wrong with using either of the two methods above. However, most applications on your phone would bypass them. The only applications you can be sure will respect and use them will be your browser apps.
If you need proxies for other apps, then you need to use a proxy client which will force all web requests from your Android phone through a proxy. ProxyDroid is the most common proxy client on Android — requires root access to work. Below is how to use it on your device.
Step 1: Install the application from their website or Google Play Store for older devices.
Step 2: Launch the app and click on Address. You’ll be taken to the interface to set up proxies.
Step 3: Under the host, enter the proxy address.
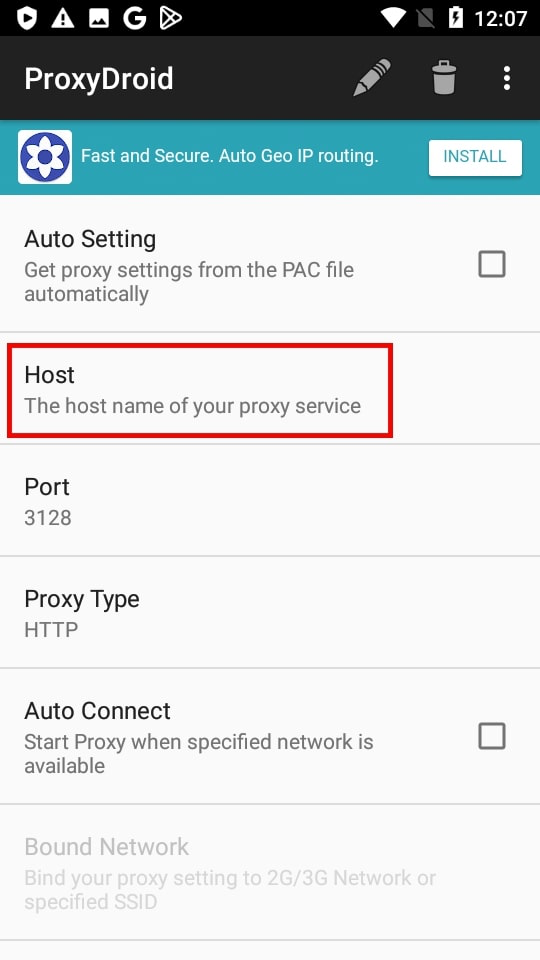
Step 4: Under port, enter the proxy port.
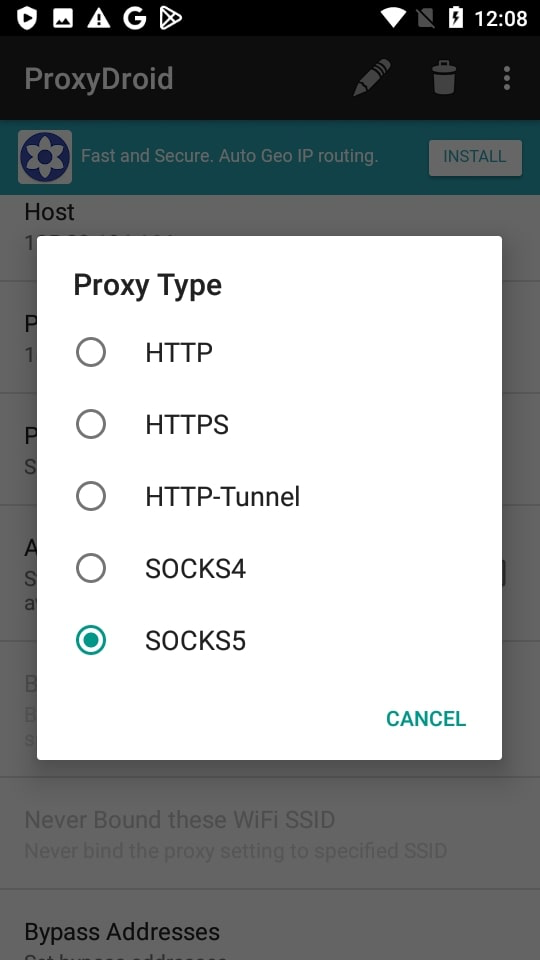
Step 5: You can choose the appropriate protocol for proxy type — HTTP, HTTPS, SOCKS4, or SOCKS5.
Step 6: Under the account information, enable authentication.
Step 7: Provide the username and password for the proxy.
Step 8: Under the service controller, Enable Proxy under the Proxy Switch section.
Step 9: You’re all set to using proxies and the web requests by all of your apps will be forced via the proxy you configured.
App-Specific Proxy Configurations
Most e-commerce and social media apps do not support the use of proxies as they themselves strive to track their users’ IP addresses. For this reason, there’s no app-specific proxy configuration for most of the popular web services out there. However, there are some apps that support proxy configuration, especially privacy-enhancing and supportive applications. Telegram is one of such app that allows you to configure proxies. Some online gaming apps also support proxies to keep their players protected from preying eyes looking for IP addresses to grab. You’ll need to look for a specific guide on how to set up proxies for the applications that allow you to configure and use proxies.
Best Proxies for Android
If you already know the best proxies to use, you might as well skip this section as it is written for those that don’t. It’s important you know that all proxies are not created equally, do not work the same way, and certainly shouldn’t be used for the same tasks.
If you need proxies just to hide your IP address in other to unblock websites and access geo-targeted websites, an ISP proxy otherwise known as a static residential proxy is the best proxy for you. This provider uses residential IP, the same as the type assigned to you by your ISP. To access geo-targeted content with it, you’ll have to purchase a proxy of the region allowed. Some of the best providers of ISP proxies include Proxy-Seller, Proxy-Sale, and Smartproxy.
For playing online games, you can use datacenter proxies as they are the fastest and also cheapest. MyPrivateProxy and Proxy-cheap are the best in this category. Residential proxies should be used when you need to change your IP address frequently probably because you operate multiple accounts. For residential proxies, Smartproxy and Proxy-cheap are the affordable options for mobile proxy usage.